Your roof is more than just a protective barrier—it’s a critical component that determines your home’s comfort, energy efficiency, and long-term durability against climate challenges.
🏠 Why Your Roof’s Climate Performance Matters More Than Ever
Climate extremes are becoming the new normal. From scorching summers that turn attics into ovens to frigid winters that skyrocket heating bills, your roof bears the brunt of weather fluctuations. Without proper insulation and ventilation, you’re essentially living with a compromised thermal envelope that costs you money every single day.
The average homeowner loses between 25-30% of their heating and cooling energy through an inadequately insulated roof. That’s not just an environmental concern—it translates to hundreds or even thousands of dollars wasted annually. More importantly, poor roof performance creates uncomfortable living conditions, moisture problems, and premature deterioration of roofing materials.
Understanding how insulation and ventilation work together creates a climate-proof system that protects your investment while maintaining comfortable indoor temperatures year-round. This guide will walk you through everything you need to know about optimizing your roof’s performance.
The Science Behind Roof Insulation: How Heat Transfer Affects Your Home
Heat naturally moves from warmer areas to cooler ones through three mechanisms: conduction, convection, and radiation. Your roof experiences all three, making it the primary battlefield in your home’s thermal performance war.
During summer, solar radiation heats your roof surface to temperatures exceeding 150°F (65°C). Without adequate insulation, this heat conducts through roofing materials into your attic and living spaces. In winter, the reverse happens—your expensive heated air rises and escapes through an under-insulated roof.
Quality insulation works by trapping air in tiny pockets, creating resistance to heat flow. This resistance is measured in R-values, with higher numbers indicating better insulating performance. The U.S. Department of Energy recommends R-values between R-38 and R-60 for attics, depending on your climate zone.
Understanding R-Values and Climate Zones
Your geographic location determines the optimal insulation level for your roof. Northern climates require higher R-values to combat severe winters, while southern regions focus on preventing heat gain during extended cooling seasons.
Climate Zone 1 (Florida, Hawaii) typically requires R-30 to R-49, while Zone 7 (Northern Minnesota, Alaska) demands R-49 to R-60 or higher. Zones 2-6 fall somewhere in between, with specific recommendations based on heating and cooling degree days.
Installing insulation beyond the recommended R-value offers diminishing returns. The key is achieving the right balance for your specific climate while ensuring proper installation without compression or gaps that create thermal bridges.
Types of Roof Insulation: Choosing the Right Material for Your Needs
Not all insulation materials perform equally, and your choice should consider factors beyond just R-value per inch. Installation method, moisture resistance, longevity, and budget all play crucial roles in determining the best option for your situation.
Fiberglass Batt Insulation
Fiberglass batts remain the most common and affordable insulation option. Available in pre-cut sections that fit between standard joist spacing, they’re relatively easy for DIY installation. However, they’re sensitive to moisture and lose effectiveness when compressed or improperly installed.
Modern fiberglass batts come with kraft paper or foil facings that serve as vapor retarders. Unfaced batts work well for adding insulation layers over existing materials. Expect R-values between R-2.9 and R-3.8 per inch, making them cost-effective but space-hungry.
Blown-In Cellulose and Fiberglass
Blown-in insulation offers superior coverage, filling irregular spaces and gaps that batts can’t reach. Cellulose, made from recycled paper treated with fire retardants, provides excellent performance at R-3.2 to R-3.8 per inch while being environmentally friendly.
Loose-fill fiberglass achieves similar R-values and resists moisture better than cellulose. Both types settle over time, potentially reducing effectiveness by 10-20%, so contractors typically over-apply to compensate. Professional installation is recommended for proper density and coverage.
Spray Foam Insulation: The Premium Solution
Spray polyurethane foam represents the highest-performing insulation category, with closed-cell foam achieving R-6 to R-7 per inch—nearly double that of traditional materials. It creates an air seal while insulating, addressing both thermal resistance and air leakage simultaneously.
Open-cell spray foam costs less but offers lower R-values (R-3.5 per inch) and requires vapor barriers. Closed-cell foam acts as its own vapor barrier and adds structural strength to roof decking. The higher upfront cost often pays for itself through superior energy savings and longevity.
Rigid Foam Board Insulation
Rigid foam panels work exceptionally well for cathedral ceilings and roof retrofits where space is limited. Polyisocyanurate (polyiso) boards deliver R-6 per inch, while extruded polystyrene (XPS) provides R-5 and expanded polystyrene (EPS) offers R-4 per inch.
These boards resist moisture, don’t settle, and maintain their R-value over time. They’re particularly effective when installed as continuous insulation over roof decking, eliminating thermal bridging through framing members.
⚡ The Ventilation Equation: Why Air Movement is Critical
Here’s a counterintuitive truth: your well-insulated attic still needs ventilation. Many homeowners mistakenly believe that sealing everything tight maximizes efficiency, but proper ventilation prevents moisture accumulation, extends roof life, and actually improves energy performance.
Ventilation removes heat buildup in summer and moisture in winter. Without it, trapped humidity condenses on cold surfaces, promoting mold growth, wood rot, and insulation degradation. Ice dams form when inadequate ventilation allows heat to escape through your roof, melting snow that refreezes at colder eaves.
The gold standard calls for one square foot of ventilation area per 150 square feet of attic floor space, split evenly between intake (soffit) and exhaust (ridge or roof) vents. Balanced ventilation creates continuous airflow that carries away heat and moisture naturally.
Intake Ventilation: The Foundation of Air Movement
Soffit vents installed along your roof’s eaves provide critical intake ventilation. Air enters through these lower vents, flows upward through the attic space, and exits through ridge or roof vents at the peak—a process called the stack effect.
Continuous soffit vents offer superior performance compared to individual circular vents, providing uninterrupted intake across the entire eave line. However, they’re worthless if insulation blocks them. Always use baffles or rafter vents to maintain a clear air channel from soffit to roof deck.
Exhaust Ventilation Options
Ridge vents represent the most effective exhaust solution for most homes. Installed along the roof peak, they create even air distribution across the entire attic. When paired with adequate soffit intake, ridge vents work continuously without moving parts or electricity.
Gable vents work best when ridge vents aren’t feasible, though they create less uniform airflow. Roof vents (box vents or turtle vents) serve as alternatives but require multiple units for adequate exhaust capacity. Avoid mixing ventilation types, as this disrupts balanced airflow patterns.
Powered Ventilation: When and Why
Attic fans with thermostats can supplement natural ventilation in extreme climates or homes with ventilation restrictions. However, they consume electricity and can create negative pressure that pulls conditioned air from living spaces if the attic floor isn’t properly sealed.
Solar-powered attic fans offer a compromise, providing supplemental ventilation without electrical costs. Use them judiciously—most homes achieve better results by optimizing natural ventilation systems rather than relying on mechanical solutions.
🔧 Installation Best Practices: Getting It Right the First Time
Even premium materials fail when improperly installed. Professional installation typically delivers better results, but informed homeowners can successfully tackle insulation projects with proper planning and attention to detail.
Air Sealing Comes First
Before adding insulation, seal air leaks in your attic floor. Gaps around plumbing stacks, electrical wires, recessed lights, and attic hatches allow significant air exchange that undermines insulation effectiveness. Use caulk for small gaps and expanding foam for larger openings.
Don’t overlook the attic hatch itself—add weatherstripping around the perimeter and insulate the hatch cover to the same R-value as surrounding areas. This often-neglected detail eliminates a major source of energy loss.
Maintaining Proper Ventilation Clearances
Install baffles between every rafter pair to prevent insulation from blocking soffit vents. These rigid channels maintain a minimum two-inch air gap from soffit to roof deck, ensuring unobstructed airflow even when insulation is installed to recommended depths.
Never cover ridge vents or gable vents with insulation. Mark these areas clearly before blowing in loose-fill insulation, and create barriers that prevent material from migrating into ventilation spaces over time.
Managing Moisture and Vapor Barriers
In cold climates, vapor barriers typically belong on the warm (interior) side of insulation to prevent moisture-laden air from reaching cold surfaces where it condenses. However, improper vapor barrier placement can trap moisture and cause damage.
Most modern building practices favor air sealing over vapor barriers, as stopping air movement prevents far more moisture transmission than vapor diffusion alone. In mixed or hot-humid climates, vapor barriers may be unnecessary or even counterproductive—consult local building codes.
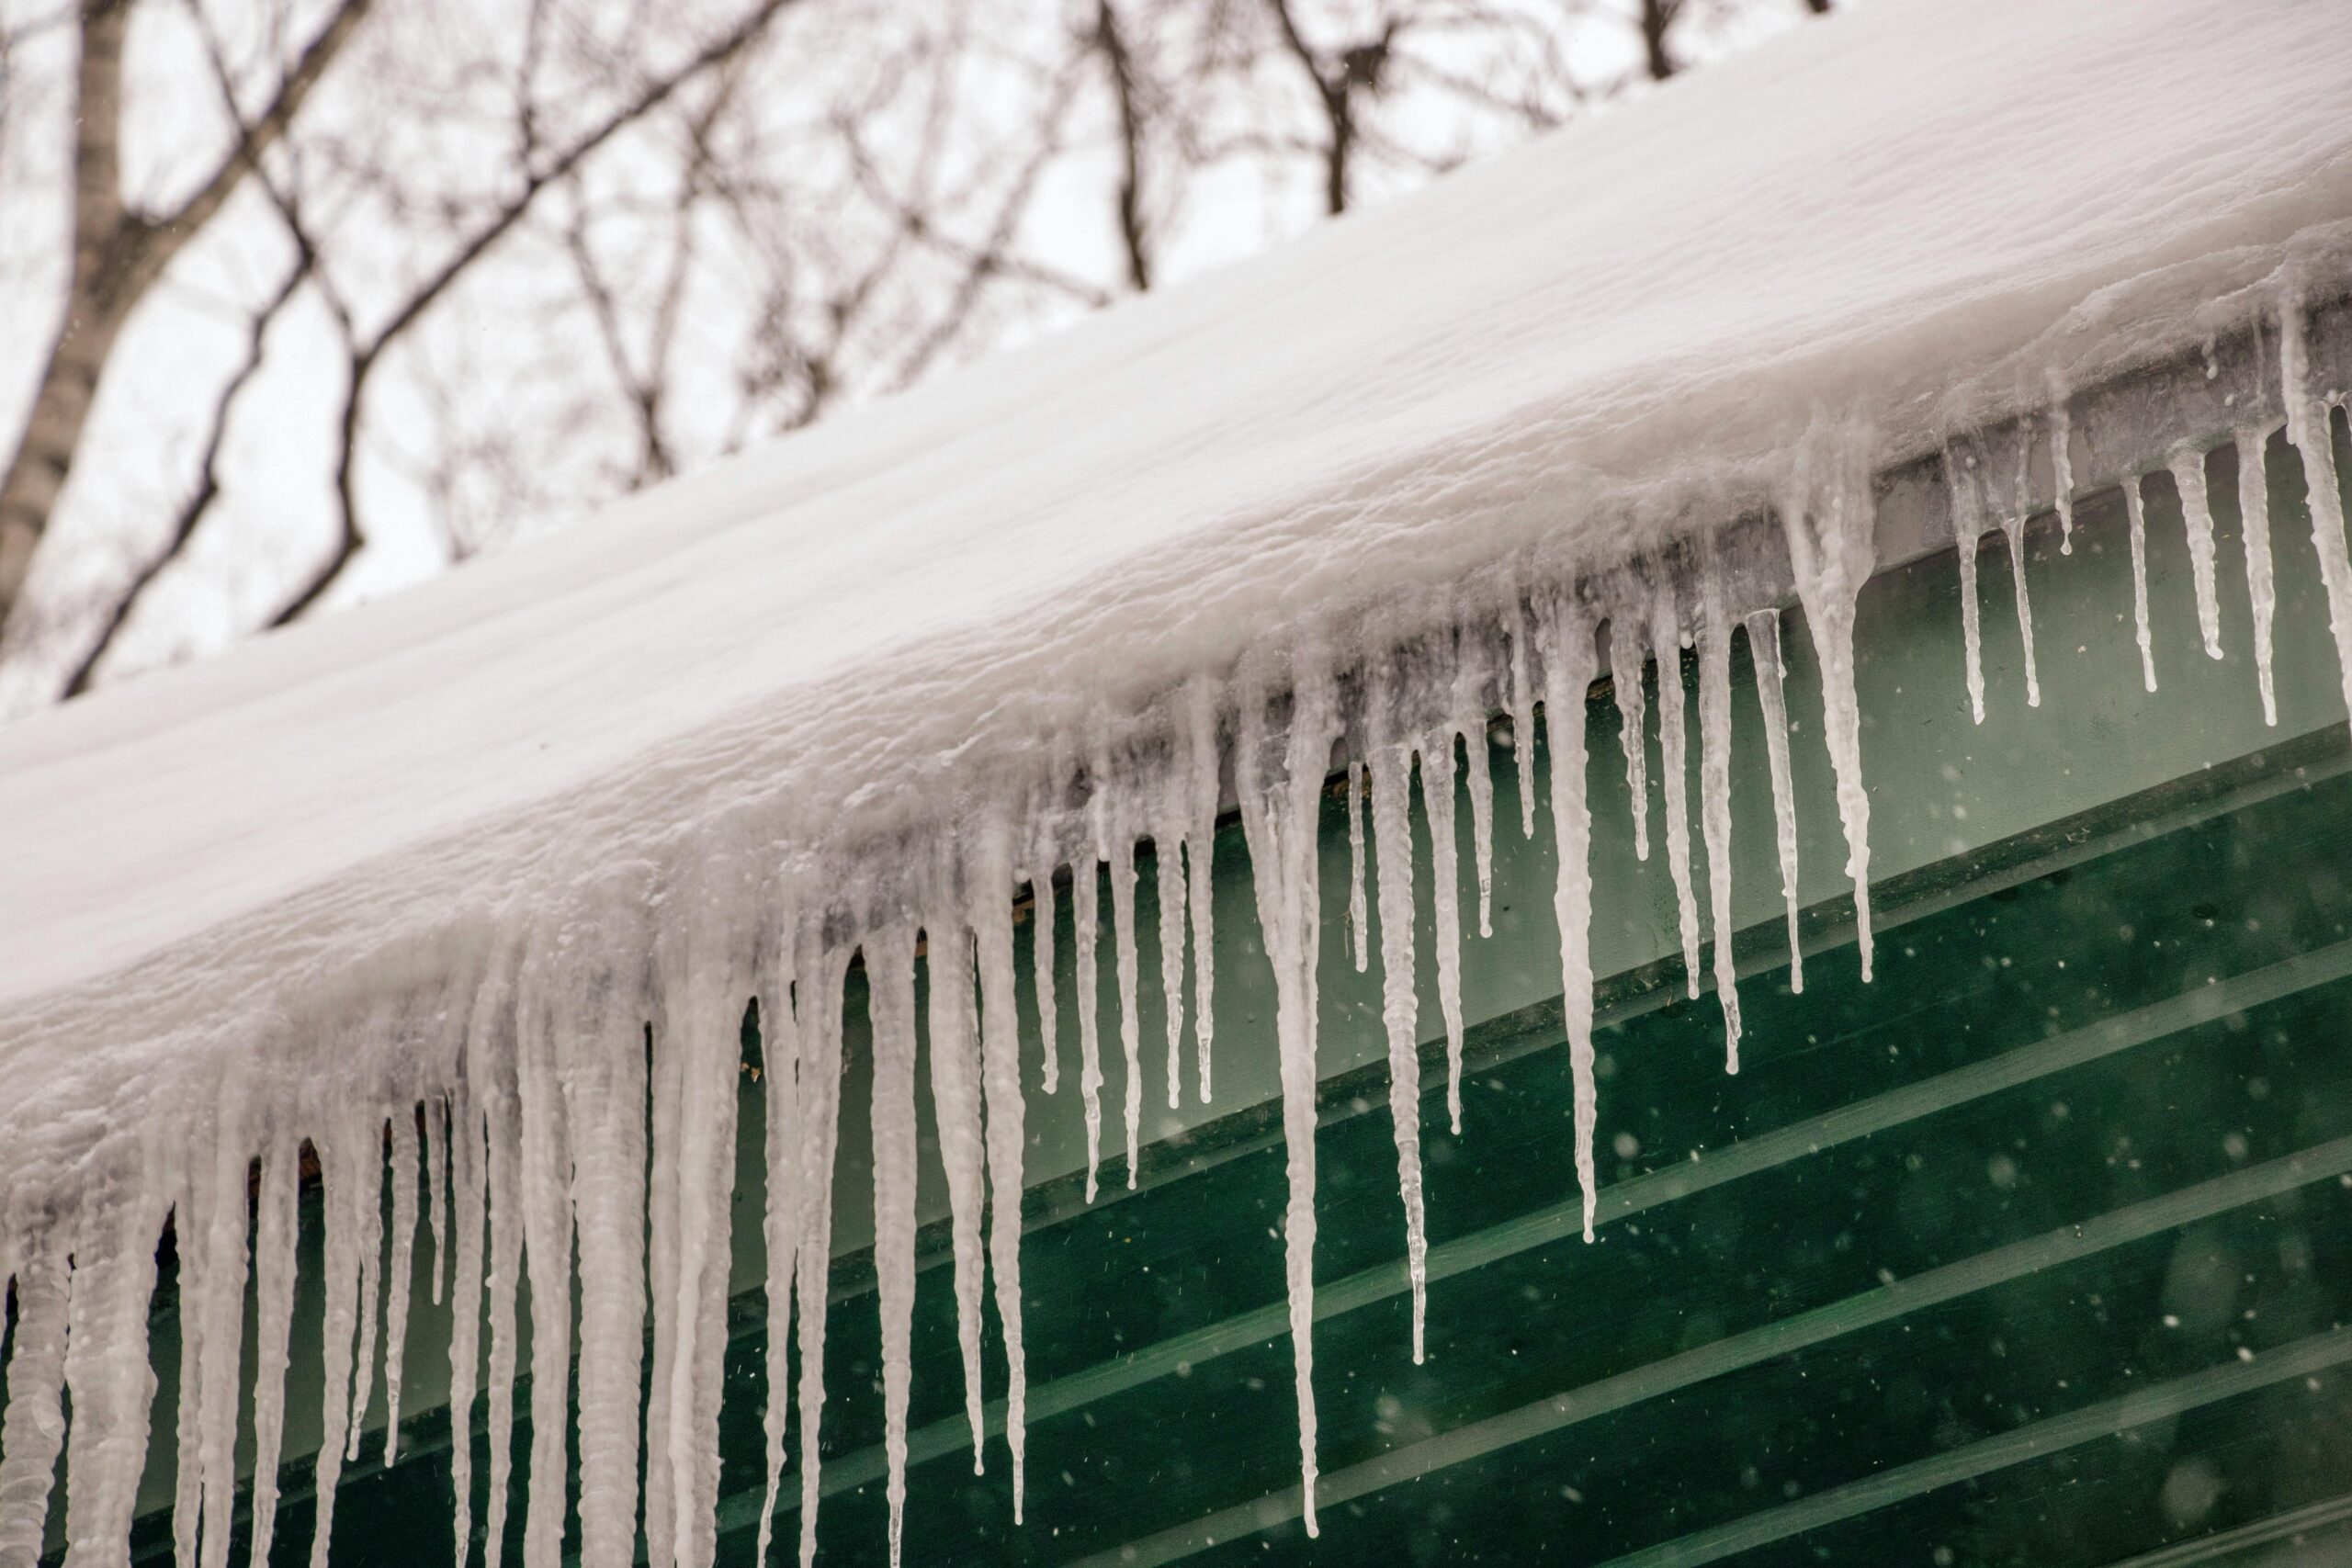
❄️ Preventing Ice Dams: A Critical Winter Concern
Ice dams form when heat escaping through your roof melts snow, which then refreezes at colder eaves, creating ice buildups that force water under shingles. The resulting damage can cost thousands in repairs and creates serious moisture problems.
The solution involves three elements working together: adequate insulation to prevent heat loss, air sealing to stop warm air leakage, and proper ventilation to keep roof surfaces cold. This combination maintains uniform roof temperatures that prevent the melt-freeze cycle causing ice dams.
In extreme climates, consider additional protective measures like heated cables along eaves or ice-and-water shield membranes under shingles. However, these address symptoms rather than causes—proper insulation and ventilation remain the fundamental solutions.
💰 Calculating Costs and Return on Investment
Roof insulation and ventilation upgrades require upfront investment, but energy savings typically provide payback within 3-8 years depending on current conditions, climate, and energy costs. Beyond financial returns, improved comfort and reduced environmental impact offer intangible benefits worth considering.
Basic DIY fiberglass batt installation for a 1,500-square-foot attic costs approximately $600-$1,200 in materials. Professional blown-in insulation ranges from $1,500-$2,500 for the same space, while spray foam runs $3,000-$7,000 depending on coverage area and foam type.
Ventilation improvements vary widely based on scope. Adding soffit and ridge vents during roof replacement costs $300-$1,000, while retrofitting ventilation to an existing roof can exceed $2,000 including necessary carpentry work.
Many utility companies offer rebates for insulation upgrades, potentially offsetting 10-30% of costs. Federal tax credits may also apply for energy-efficiency improvements—check current programs before starting your project to maximize available incentives.
🌡️ Monitoring and Maintaining Your Climate-Proof Roof
After upgrading insulation and ventilation, ongoing monitoring ensures systems continue performing optimally. Annual attic inspections catch problems before they escalate into costly repairs.
Check insulation depth and condition, looking for compression, moisture damage, or gaps. Verify ventilation remains unobstructed, with clear airflow paths from soffit to ridge. During winter, uniform snow coverage on your roof indicates good insulation and ventilation—bare patches suggest heat loss.
Interior warning signs include ice dams, moisture stains on ceilings, unusually high energy bills, and rooms that are difficult to heat or cool. Address these symptoms promptly by investigating and correcting the underlying insulation or ventilation deficiency.
Smart Technology for Roof Performance Optimization
Modern technology helps homeowners monitor and optimize roof performance. Smart attic sensors track temperature and humidity, alerting you to conditions that indicate ventilation problems or insulation failures before damage occurs.
Thermal imaging cameras, available as smartphone attachments, visualize heat loss patterns and insulation gaps invisible to the naked eye. Many energy auditors use professional-grade thermal cameras during home assessments—consider hiring one before and after insulation upgrades to verify improvements.
Smart thermostats learn your preferences while optimizing HVAC runtime, reducing demands on heating and cooling systems. When paired with proper insulation and ventilation, these devices maximize comfort while minimizing energy consumption throughout the year.
🌍 Environmental Impact: Beyond Energy Savings
Climate-proofing your roof delivers environmental benefits extending beyond reduced energy consumption. Lower heating and cooling demands decrease fossil fuel use and associated greenhouse gas emissions, contributing to climate change mitigation.
Choosing eco-friendly insulation materials amplifies these benefits. Cellulose insulation contains 80-85% recycled content and requires minimal energy to manufacture compared to fiberglass or foam. Wool insulation, though expensive, offers excellent performance with completely renewable, non-toxic materials.
Proper ventilation extends roof life by preventing moisture damage and heat-related deterioration, reducing the frequency of resource-intensive roof replacements. This longevity benefit often goes overlooked when calculating environmental impact but represents significant material and waste savings over decades.
Regional Considerations: Tailoring Solutions to Your Climate
Optimal insulation and ventilation strategies vary significantly based on regional climate characteristics. Hot-humid climates prioritize radiant barriers and adequate ventilation to combat solar heat gain, while cold climates focus on maximizing R-values and preventing ice dams.
Desert climates with extreme temperature swings benefit from high thermal mass and reflective roofing combined with substantial insulation. Coastal regions require moisture-resistant materials and enhanced ventilation to handle high humidity levels.
Consult local building codes and energy programs for region-specific recommendations. These resources reflect decades of research into what works best in your specific climate, helping you avoid solutions that perform poorly in local conditions.
Making Your Climate-Proof Roof Investment Worthwhile
Transforming your roof into a climate-proof barrier requires understanding how insulation and ventilation work together to create a high-performance system. By selecting appropriate materials for your climate, ensuring proper installation, and maintaining balanced ventilation, you’ll create a comfortable home that performs efficiently regardless of outdoor conditions.
The initial investment in quality insulation and ventilation pays dividends through lower energy bills, improved comfort, extended roof life, and reduced environmental impact. Whether you tackle the project yourself or hire professionals, the principles remain the same: adequate insulation to resist heat transfer, proper air sealing to prevent leakage, and balanced ventilation to manage moisture and temperature.
Your roof represents one of the most impactful opportunities for energy efficiency improvements in your home. With climate extremes becoming more frequent and energy costs continuing to rise, there’s never been a better time to climate-proof this critical component. Take action today to enjoy the comfort, savings, and peace of mind that comes with a properly insulated and ventilated roof system that stands up to whatever weather comes your way.